Feeds:
Posts
Comments

Posts Tagged ‘allotment recipe’

red-tomato-chutney

This morning there is a faint smell of vinegar in our house, yesterday I made Red Tomato Chutney using the crops that I had grown, Tomatoes (Large fleshy beef variety that contain very little juice or seeds), Onions and Bramley Apples, I made a large batch which produced 13 jars of this wonderful chestnut brown preserve, it cannot be eaten straight away as most chutneys take time to mature and should be left for at least a month before opening, I like to leave mine a little longer and will be eating this at Christmas with the Turkey. There are so many variations of Chutneys I think it is a case of anything goes whether its fruit, vegetables or a combination of both, it’s a great way to use up the last of your crops or alternatively to make good use of a glut. The word ‘Chutney’ is derived from the Hindu word ‘chatni’ which means strongly spiced if you like lightly spiced chutney then this recipe is perfect for you.

Red Tomato Chutney

Ingredients

  • 900g/2lb Tomatoes (firm but ripe)
  • 450g/1lb Onions
  • 450g/1lb Cooking Apples (weight when peeled and cored)
  • 450ml/¾ pint Malt or Wine Vinegar (I used Malt)
  • ½ – 1 teaspoon Ground Ginger
  • ½ – 1 teaspoon Ground Mixed Spice
  • 350g/12oz Sugar
  • 300g/10oz Sultanas
  • Salt and freshly ground Black Pepper to taste

What you need to do

  1. Skin and chop the tomatoes, peel and finely chop the onions and the apples.
  2. Put all the ingredients into the preserving pan except for the sugar, sultanas and the seasoning, simmer gently until tender.
  3. Add the sugar and stir over a low heat until dissolved then put in the sultanas and seasoning.
  4. Simmer steadily, stirring regularly until it is the consistency of a thick jam.
  5. Spoon into hot sterilized jars, add a waxed circle and tighten the lid securely.
  6. Store in a dark, cool and dry place.

Notes:

  1. I made 2.5 times the above quantities in a large stainless steel pan 17cm high x 25cm diameter, this is the maximum volume that can be made in this size of pan.
  2. Once the sultanas have been added you need to stir the mixture regularly as they sink to the bottom and can burn.
  3. If the chutney is slow to reduce down to a jam consistency, spoon off some of the watery mixture from the top of the pan and sieve out the vinegar liquid returning any pulp to the pan.

Homemade chutneys, jams and preserves make a lovely personal gift, why not plan ahead and give friends/family a home produce hamper this Christmas.

Gill

Read Full Post »

Nasturtiums

Why not impress your friends and liven up your salads with Nasturtium petals, flowers, leaves, stems and seeds, they are all edible and have a peppery watercress like taste, the flowers are the mildest and the seed pods the strongest.

Nasturtiums (Tropaeolum majus) are easy to grow, have wonderful bright orange, yellow and red flowers and are delicious to eat, sow now to pick throughout the Summer.

Nasturtium seeds are widely available in shops, and garden centres, check on the packet that it is an edible variety. Sow seeds 1cm deep in small pots of compost and place on a warm sunny windowsill at 15-25C to germinate this will take approx. 7-14 days. Grow your plants on and harden off before planting outside after all risk of frost has passed.

Nasturtiums are fast growing and will sprawl across the ground if planted in the border or trail and create an attractive cascade if planted in a hanging basket, window box or container. Nasturtiums need very little attention, they grow best in full sun preferring the soil to be slightly dry, containers can dry out quickly so may need to be watered more often, Rain Gel Water Storage granules added to the compost will hold the moisture in and reduce the frequency of watering.

Start picking from your plants when several leaves and the bright flowers (approx. 6 weeks after sowing) have appeared. Always ask an adult before eating anything from the garden.

Here are some culinary suggestions for your Nasturtiums:

  • Make attractive flowery ice cubes, place the flowers/petals in an ice cube tray with water and freeze.
  • Nasturtium Butter – use to flavour potatoes, vegetables, fish or chicken.
  • Make Flavoured Oils, Vinegars or Dressings using the flowers and leaves.
  • Stuffed Nasturtium flowers – fill large flowers with, cream cheese, humus or guacamole and gently fold in the petals.
  • Include in a Salad or use as a garnish.

Towards the end of Summer allow some flowers to set seed, collect the seeds when they change from green to a tan colour, spread them out on a paper plate indoors to dry out for approx. two weeks before storing in an airtight container in a cool, dry place – you can plant these next year.

Even if you don’t fancy eating Nasturtiums or you dislike their taste they are definitely worthy of a place in your garden they are vibrant, easy to grow and will brighten up any corner.

Gill

Read Full Post »

We have been spoilt recently with the weather and it has definitely paid dividends in the fruit and vegetable garden; regular pickings of Autumn raspberries, pumpkins, squashes and marrows maturing and ripening ready for storing, apples, pears and plums still hanging on the trees, an extra spurt of growth in the vegetables extending their harvesting season, and the onions and garlic now completely dry and ready for storing.

Today the weather has changed and is back to what you could expect for October – wind and rain with frosts on the horizon, now is the time to pick and store what you can, when storing your crops choose those that are undamaged and disease free, once stored check them regularly and remove any that are going bad, these don’t necessarily have to go straight onto your compost bin, most will be perfectly edible once you have removed the bad bits. Why not use these in a Ratatouille it’s a delicious warming one pot dish perfect for a wet and windy Autumn day and a great way to use up your less than perfect crops, the ingredients can be always be varied to suit your taste and the availability of vegetables.

Autumn Ratatouille

What you will need

  • 2 large Aubergines
  • 3 medium Courgettes
  • 2 medium Onions, roughly chopped
  • 2 green or red peppers, deseeded and chopped
  • 6 large tomatoes or a 440g tin chopped tomatoes
  • 2 cloves garlic, crushed
  • 4 tablespoons olive oil
  • Salt and pepper
  • 1 teaspoon Oregano
  • Grated cheese/Parmesan Cheese
  • Fresh basil to garnish

What you need to do

  1. Cut the Aubergines and Courgettes into 2.5cm/1” slices then cut each Aubergine slice into quarters and the Courgette slices into similar sized pieces.
  2. If using fresh tomatoes place them in boiling water for a minute then drain and allow to cool before peeling off the skins, cut into quarters, remove the seeds and roughly chop up.
  3. Heat the oil in a flame proof casserole dish or large saucepan, add the onions and cook for approx. 10 minutes until browned and tender.
  4. Add the Courgettes and Aubergines and cook for a further 5 minutes before adding the peppers, garlic, oregano and salt and pepper then mix well.
  5. Cover and cook over a gentle heat for 20 minutes.
  6. Stir in the chopped tomatoes and cook for a further 10 minutes.
  7. Top with the cheese and basil and serve with crusty bread, garlic bread or pasta.

This dish is packed full of vitamins and minerals and can help towards your five a day.

If you are looking for some storage ideas for your fruit and vegetables why not consider

Wooden Stackable Storage Boxes available from £19.95

Tubby Stack Pack Wooden Storage Boxes and Crates

or if you have a larger harvest to store a Wooden Fruit and Vegetable Larder, Rack or Store available from £40.00

in 4 sizes each with 4 height options

Wooden Fruit and Vegetable Larder, Rack and Store

for more information visit the Gardening Works website by clicking here.

Gill

Read Full Post »

ManWide

Next week is National Allotment Week (10th – 16th August), it is organised by The National Allotment Society (NSALG) which is the leading national organisation upholding the interests and rights of the allotment community across the UK. They work with the government at national and local levels, other organisations and landlords to provide, promote and preserve allotments for all and offer support, guidance and advice to members and those with an interest in allotment gardening.

There are lots of events being organised on Allotments throughout the country including talks, cookery demonstrations, BBQs, children’s activities and raffles with tea, cakes and home grown produce for sale, click here to find out what is happening near you.

The National Allotment Week theme this year is designed to emphasize the benefits that allotments bring to everyone regardless of age or gender and to also highlight the fact that we all need to value our remaining plots and preserve them for future generations to enjoy, allotment sites are vulnerable to pressures from development and steps need to be taken to prevent further depletion of our allotments.

The demand is high for allotments often with long waiting lists, if you are interested in obtaining an allotment click here for more information.

Allotments are not just places to grow fruit and vegetables they are mini communities containing a wide range of people who have different lives, personalities, cultures and jobs but who all share the same passion for gardening.

As well as growing fruit and vegetables, there is so much more you can do on an allotment:

  • Relax and recuperate
  • Have a BBQ or Picnic
  • Watch and make homes/habitats for wildlife
  • Experiment with new crops
  • Teach children how to grow food
  • Keep chickens and livestock
  • Have Bee hives and produce your own honey
  • Share your gardening knowledge and learn new skills from your allotment neighbours
  • Hold seasonal fruit and vegetable shows
  • Have fun growing competitions
  • Arrange visits from schools and community groups to educate them about growing crops
  • Hold open days to encourage others

picture 1

I feel extremely privileged to have an allotment, sometimes they can be hard work and you do need to have a certain amount of free time to look after them but the rewards far outweigh the effort, there is nothing more satisfying than eating home grown produce that has been freshly picked, my allotment is my retreat where I can switch off, unwind and can be in harmony with nature – I love it!

Gill

Read Full Post »

DSC05882

This week (18-24th May) we are being encouraged by the British Tomato Growers Association to buy home grown British tomatoes, tomatoes are very healthy and delicious whether they are eaten raw or cooked, they are a good source of Vitamins A, C and E and contain minerals such as potassium which can lower blood pressure and calcium which we need for healthy bones and teeth.

Here is a simple tasty idea to use your British Tomatoes:

Easy Pizza with home made Tomato Sauce

Ingredients

  • 800g ripe fresh tomatoes
  • 1 large onion chopped
  • 2 cloves garlic crushed
  • 1tsp sugar
  • 2 tbsp tomato puree
  • 1 to 2 tsp dried Italian or mixed herbs or a handful of fresh Basil chopped or torn into small pieces
  • 2 tbsp olive oil
  • Salt and freshly ground Black pepper
  • Grated Mozzarella Cheese and toppings

What you need to do

  1. In a large pan heat the oil on medium/low and cook the onion until soft and translucent then add the crushed garlic and cook for a couple of minutes, do not allow to burn.
  2. Chop your tomatoes and add to the pan with the remaining ingredients and simmer for 30 minutes.
  3. Allow to cool and blend until smooth.
  4. This sauce is delicious with pasta and can be frozen.
  5. If you are making pizzas with children for speed and convenience use a packet pizza base mix or buy ready made pizza bases, then spread your Pizza Sauce over the base with the back of a spoon, sprinkle on grated Mozzarella Cheese and add your favourite topping the combinations are endless: Ham, Salami, Pepperoni, Chicken, Tuna, Prawns, Mushroom, Onion, Peppers, Pineapple, Olives, Sweetcorn…
  6. Bake in the oven at 230C/450F/Gas mark 8 for about 15 minutes until crisp and golden.

Making Pizzas

Nothing beats the taste of freshly picked home grown tomatoes, when they are ready it’s often a race as to who gets to them first, make sure you grow plenty a lot won’t make it back to the kitchen.

If you want to have a go at growing your own tomatoes young plants are widely available now in shops and garden centres for more information and full growing instructions click here.

Why not have a go at making your own Pizzas this week.

Enjoy

Gill

Read Full Post »

Rhubarb buds

I am sure that most of you will have a clump of it in your garden or on your allotment, although it can grow quite big it is often overlooked and not really eaten – it’s Rhubarb.

If you do have a root or crown you will notice that it is coming to life, its large smooth coated ‘buds’ are splitting to reveal new leaves on short stems, to get long, tender, delicious pale pink stems you need to block out all light and ‘force’ them by covering the crown with a large container/bucket, old chimney pot, dustbin or a traditional terracotta Rhubarb forcer, my dad even uses an old dolly tub, place bricks on top to weigh them down, you can start forcing Rhubarb in January for an earlier crop. Harvest the forced stems when they are approx. 20-30cm long, cut off the poisonous yellow leaves, these can be put in your Compost Bin, to pick Rhubarb hold the stalk at the base, pull and twist away from the crown so that it tears off.

Rhubarb is actually a perennial vegetable although we often regard it as a fruit, it is available to pick fresh when other fruits are in short supply and often expensive, even if you have to buy some it is inexpensive when in season.

Forced Rhubarb

This picture shows forced taller, yellow leaved Rhubarb stems and smaller green leaved Rhubarb stems which haven’t been forced

Rhubarb is an easy plant to grow and will thrive on neglect, it prefers a moist fertile soil in a sunny position, plant Crowns in Spring or Autumn, although it can grow quite big it can be grown in a large Dirt Pot or Growing Bag (minimum size 40 litres), fill with a good quality Compost and mix into it well-rotted farmyard manure. Plant the crown about 3cm below the surface and water in well. Place the bags in a sunny spot watering the Rhubarb regularly especially during the Summer and during dry periods, allow new plants to become established for the first year before harvesting any stems, the following Spring only harvest a few stems at a time, remove any flower heads that appear these can be put in the Compost Bin. Rhubarb should only be forced every two years so if you prefer forced Rhubarb have two or more plants so that you can alternate them, don’t harvest stalks later than July. During Summer feed with a liquid or general-purpose fertilizer then in Autumn put your Rhubarb to bed; remove any old leaves and mulch around (not on) the crown with well-rotted farmyard manure.

Rhubarb makes a delicious dessert why not have a go at our

Easy Rhubarb Fool

Ingredients

  • 350g Rhubarb, washed, trimmed and sliced
  • Finely grated zest and juice of half an orange
  • 55g Caster Sugar
  • 150ml Double Cream
  • 150ml Greek Yoghurt
  • Shortbread or Oat Biscuits

What you need to do

  1. Place the Rhubarb, Zest, Juice and Sugar in a pan and heat, stirring until the sugar has dissolved.
  2. Bring to the boil and simmer for 5-6 minutes, stirring occasionally, until the Rhubarb softens and starts to break up, remove from heat and allow to cool.
  3. Softly whip the Cream and Yoghurt together, fold in half of the cooled Rhubarb mixture.
  4. Spoon the stewed Rhubarb/Orange mixture and the creamy Rhubarb mixture in alternate layers into glasses or small dishes and serve with the biscuits.
  5. For a grown up version add a splash of Cointreau Orange Liqueur to the Rhubarb/Orange mixture.
  6. Serves 4

Why not have a go at our other Rhubarb Recipes?

Click here for the Rhubarb Crumble Recipe or here for Rhubarb Muffins, I don’t think you can beat Rhubarb Crumble served of course with Custard, simply delicious.

Enjoy!

Gill

Read Full Post »

I can’t believe what glorious weather we are having, scorching hot days and sultry evenings, it is wonderful and a real tonic. The soft fruit on the allotment is ripening fast, I will have to keep my eye on it and the opportunist birds too, netting will keep them off and allow me to get there first. I make Jams and freeze a lot of my fruit to use in pies and crumbles later on when fresh fruit is not available or expensive to buy.

Strawberries 2

Strawberries have done exceptionally well this year, as it’s hot I thought it would be nice to make something cooling with my bumper crop so I delved into my recipe books and found the perfect solution –

Strawberry Sorbet

  • 450g Strawberries hulled and chopped
  • 175g Granulated Sugar
  • Juice of a small lemon
  • 450ml water
  • 1 egg white
  • 25g Caster Sugar
  1. Puree the prepared Strawberries in a food processor
  2. Put 150ml water and the granulated sugar in a bowl and warm gently until the sugar dissolves.
  3. Remove from the heat and stir in the remaining 300ml water, lemon juice and the pureed Strawberries, mix well.
  4. Pour into a freezer container and chill until cold.
  5. Freeze for 1 hour.
  6. Beat the egg white until stiff then add the caster sugar and whisk again until stiff and shiny.
  7. Place your fruit mixture in a chilled bowl and whisk until smooth.
  8. Gently fold in the beaten egg white then return to the freezer container and freeze for 45 minutes.
  9. Remove from the freezer, whisk again then return back to the freezer container and freeze for 90 – 120 minutes or until firm.

This is a very healthy alternative to ice cream why not serve it up whilst watching Wimbledon this week.

Enjoy

Gill

Read Full Post »

Halloween is just over a week away and Thomas and I are getting excited.

Pumpkins, Costumes, Decorations and Treats are in all the shops and supermarkets, but if you can make your own I think it is much more fun and it could save you money too. Here are a few ideas if you are celebrating at home or at school.

017

PUMPKINS

Now widely available to buy, look for one that is firm with a tough skin and not damaged (they can soon go rotten if their skin is broken, especially if they are kept somewhere warm).

If you have grown your own now is the time to harvest them before any frost, cut them off the plant leaving a long stem then place in a cool greenhouse/polytunnel or windowsill in the sun to ripen, if you want to grow your own next year click on the link below, it not as difficult as you might think and perfect for children to do.

Grow your own Pumpkins for Halloween

The traditional way to decorate your pumpkin is to carve it and place a light inside to make them glow, click on the link below for a step by step guide.

Make a Pumpkin Jack O’ Lantern

Lit Halloween Pumpkin 1

There are many other ways to decorate your Pumpkin without carving, these are ideal classrorrm activities in schools and nurseries and for young children at home, here are a few suggestions.

Sparkly Pumpkin – Cover your Pumpkin with glue and sprinkle generously or make patterns and shapes using different colours of glitter.

Painted Pumpkin – Simply use paint to decorate your pumpkin, paint on patterns, swirls, spots, stripes, flowers, faces, cats, spiders or use stencils or paper doilies for templates.

Collage Pumpkin – Accessorise your Pumpkin by sticking on sequins, beads, ribbon, string, wool, stars, gems, buttons – make an abstract pattern or a face.

Natural Pumpkin – Collect Autumn leaves of different colours, shapes and sizes and stick them all over your Pumpkin.

FUN AND GAMES

Pin the Nose on the Wicked Witch

Draw a witch on a large piece of card, it can be an outline or more detailed if you wish include its pointed hat, colour in or decorate with spiders and webs, hang your witch on a wall.

Draw and cut out a large crooked nose, place a piece of sticky tack on the back.

In turn, blind fold each child and ask them to stick the nose on the witch, older children/teachers/adults may need to be spun round to make it more difficult, the nearest to the spot wins.

09930054

Pass the Pumpkin

A Halloween version of pass the parcel, fill a hollowed out, carved pumpkin with sweets when the music stops whoever is holding the pumpkin picks out a sweet, the winner gets to take the pumpkin home.

Rosy Apples

Apple Bobbing

Fill a bucket or large cauldron ¾ full with water and add some eating apples, place an old towel or sheet underneath to catch any spills. Try and bite the apples with your hands behind your back, keep a towel handy. For a dry alternative or for those in Halloween make-up hang apples by their stems from doorways or for little ones use marshmallows or mini doughnuts.

TREATS

If you have carved your own pumpkin use the flesh to make Mini Pumpkin Cakes and toast the seeds for a delicious snack – Sweet or Savoury the method is still the same.

Sweet Toasted Pumpkin Seeds

Ingredients

  • 1 cup Pumpkin Seeds
  • 1 tablespoon Butter melted
  • 1 tablespoon Granulated Sugar
  • ½ teaspoon Cinnamon
  • ¼ teaspoon Nutmeg

Savoury Toasted Pumpkin Seeds

Ingredients

  • 1 cup Pumpkin Seeds
  • 1 tablespoon Oil
  • 1 teaspoon Worcester Sauce
  • ¼ teaspoon Salt
  • Sprinkle of Garlic Salt

What you need to do

  1. Rinse the seeds and remove as much pulp as possible, dab with kitchen roll to remove most of the moisture.
  2. Add the seeds to a bowl containing all the remaining ingredients and stir until well mixed and the seeds are completely covered, spread the seeds out on a tray lined with baking parchment.
  3. Cook in a preheated oven 275 F/135 C for about an hour or until crunchy and golden brown turning occasionally.
  4. Allow to cool.

Quick and Easy ‘Spook’ Cakes

Ingredients

  • Fairy Cakes – shop bought or homemade (plain or flavoured)
  • Ready to roll white Icing
  • Icing Sugar
  • Glace Cherries
  • Marmalade or light coloured Jam
  • Currants or suitable dark sweets for eyes

What you need to do

  1. Take the fairy cakes out of their cases and place upside down.
  2. Melt your jam in the microwave and brush over your fairy cakes.
  3. Place a cherry on the top of each, and brush with the jam.
  4. Dust your worktop with icing sugar and roll out the icing thinly.
  5. Cut out circles of icing using a saucer as a template.
  6. Re roll the offcuts to make more circles.
  7. Drape the icing circles over the cakes to create wavy pleats.
  8. Press your currants/sweets into the icing for the eyes.

Trick or Treaters

Whatever you are doing to celebrate have lots of fun

Gill

Read Full Post »

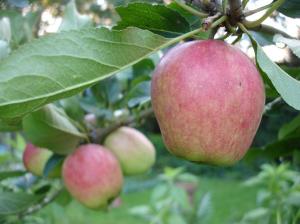
October truly is the month of the apple and this year growers have reported bumper crops with fruit that is tastier than ever due to the favourable weather. If you wish to taste some new or old varieties, many of which do not appear in our supermarkets, have a look out for an Apple Day near where you live. There are many organised events throughout the country where you can eat apples, make apple juice, walk round orchards, ask the experts about growing, pruning and training apple trees, bring in your own apples to be identified or to simply buy apples or even a tree.

You cannot beat a Bramley Apple for that lovely tangy taste and fluffy texture, they are very versatile and can be used in both sweet and savoury dishes – delicious! They are at their best at the moment and widely available, but of course if you grow your own they are even better!

This week is Bramley Apple Pie Week when we celebrate this wonderful apple, here is a delicious recipe for those of you with a sweet tooth, it would be perfect for a Halloween or Bonfire Night Party.

Toffee Apple Pie

Your ingredients

The pastry

  • 250g Plain Flour
  • 125g Butter/Margarine
  • Pinch of salt
  • 3-4 tablespoons cold water

The filling

  • 50g Caster Sugar
  • 50g Dark Muscavado Sugar
  • 50g Butter
  • 25ml water
  • 700g Bramley Apples
  • Juice and zest 1 lemon
  • ¼ teaspoon Cinnamon
  • Caster Sugar for sprinkling

25cm pie dish

What you need to do

Sift the flour and salt in a bowl, rub in the butter/margarine until it resembles breadcrumbs, add the cold water and mix with a knife until it comes together, gather up and knead to form a ball. Cover with clingfilm and chill in the fridge for ½ hour.

Peel, core and slice the apples, sprinkle over the cinnamon, the grated lemon zest and the juice, and stir.

Melt the butter in a pan, add the water and the caster and dark muscavado sugar, bring to the boil and simmer for a few minutes, add the apple mixture stir and cook for a further few minutes until the apples start to soften then leave to cool.

Preheat the oven to 170C.

Roll out 2/3rd of the pastry and line the bottom of the pie dish, fill with the cooled apple mixture.

Roll out the remaining pastry to make a lid, brush a little water around the edges of the pastry bottom  so that the lid will stick, press/crimp the edges to seal the pie and trim off any excess pastry, make 2 or 3 slits in the middle of the lid. If you wish to decorate the top, roll out the leftover pastry and cut out leaf or apple shapes, wet them underneath with water to help them stick.

Sprinkle with the caster sugar and bake for 30mins until golden brown.

Serve with cream, ice cream or custard.

You know what they say an apple a day…

Gill

Read Full Post »

Ground Spices

This week is National Curry Week, 7-13 October 2013, so to celebrate this ‘British’ favourite I thought I would share with you one of my recipes.

The great thing about curries is that you can really put your own mark on them, adding your favourite ingredients and customising them to you or your family’s tastes, they are ideal for using up your vegetable glut, why not make double quantities and freeze some for later on.

This curry is quick and easy to make, the fruit adds a nice sweetness which will appeal to children.

Fruity Chicken Curry

Your ingredients

  • 25g butter/margarine
  • 2 chicken breasts (boneless, skinless and cut into chunks)
  • 1 onion (finely chopped)
  • 2 cloves of garlic (crushed)
  • 3 tbsp curry powder
  • 1 stick of celery (sliced)
  • ½ apple (diced)
  • ½ red pepper (chopped)
  • 75g sultanas
  • 500ml chicken stock
  • Salt and pepper

What you need to do

  1. In a large pan melt the butter, add the chicken pieces and cook on medium heat until sealed and browned on all sides (approx. 8 minutes), then remove from the pan.
  2. Add the onion and garlic to the pan and fry until soft, then add the curry powder and stir well.
  3. Return the chicken to the pan with the celery, apple, red pepper, sultanas and chicken stock.
  4. Cover and simmer for 15 minutes.
  5. Serve with rice and naan bread.

Serves 2

Other vegetables that you could add include cauliflower, courgettes, runner/french beans, potatoes, carrots, spinach.

We are all big Curry fans in the office, especially Sylvia who regularly frequents her favourite local restaurant.

Why not give it a go; it will warm you up now that there is a chill in the air.

Gill

Read Full Post »

Older Posts »